DIY Installation of a Parrot CK3100 in a 2006 VW Jetta
I put this step by step guide together to help others interested in installing a Parrot unit in their 2006 VW Jetta.
Tools required:
-
#20 Torx Screwdriver
-
Small flathead screwdriver or the VW trim removal wedge tool #3409. (I used a small flathead screwdriver. Use extra care with the screwdriver so you do not scratch or damage the plastic trim pieces )
-
Wire cutters/strippers
-
Pliers (for crimping the butt connectors)
Hardware required:
-
Parrot CK3100
-
Quickconnect Harness
-
Add-A-Circuit
-
20 Gauge Wire (ignition wire)
-
Butt Connectors
-
Double-sided foam mounting tape
The first step is to remove the vent cap below. I don't believe this is an essental step, but I did it anyways.
Insert your screwdriver in one side of the cap to release the clip and gently pry it up. Repeat on other side.

Step 2
Insert your screwdriver in the middle of the temperature sensor cap and gently pry up. My car did not have a sensor, but I understand that some models do, so be careful when removing the unit.

Step 3
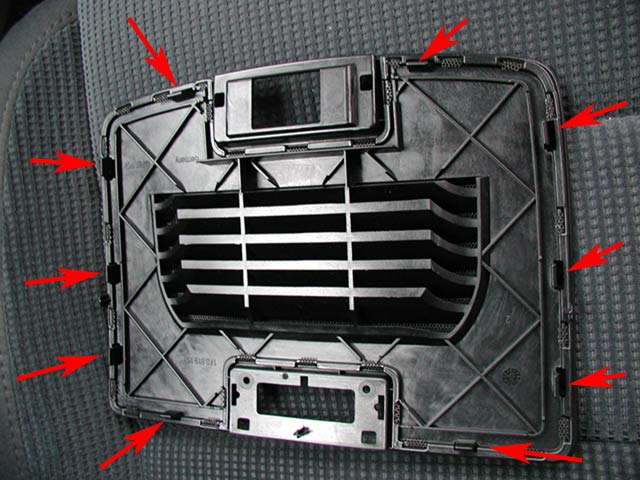
Next you will need to gently pry up the dash vent grill. You must be careful not to scratch the trim or break the tabs.
The arrows indicate approximately where the pry points are

Below is the underside of the dash vent grill which shows where the tabs are located.
Step 4
Next you will need to remove the vent housing. There is one torx screw located at the top. Begin by removing this screw.

Next, insert your screwdriver to release the two retaining clips located at the top of the housing.
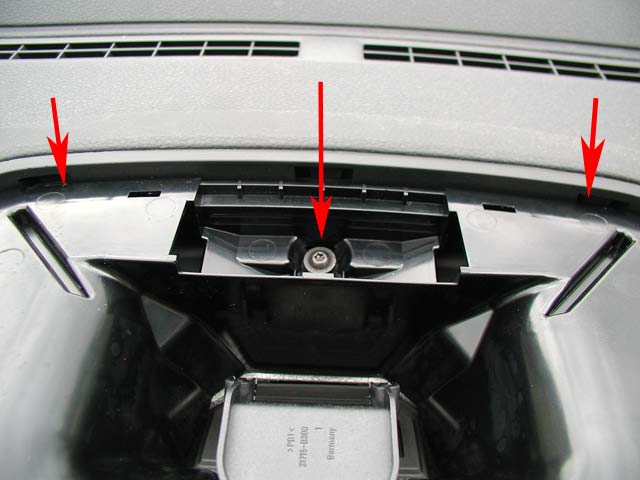
Below are the clips for the vent housing you will need to release.

Step 6
Next you will need to remove the dash cover unit. This part is the most difficult of the installation, as there are many retaining clips to release, so you must use care.
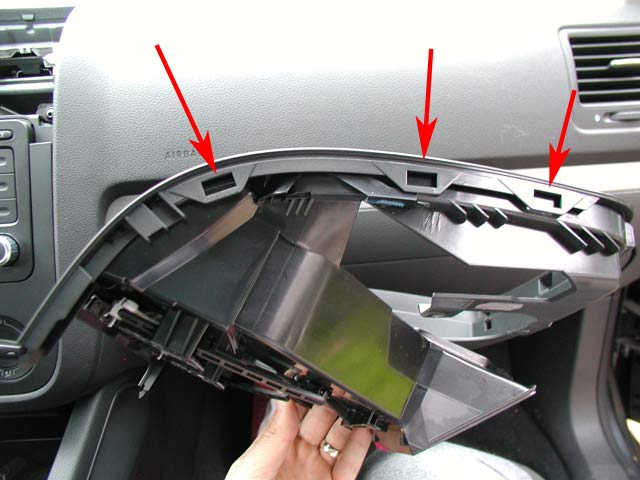
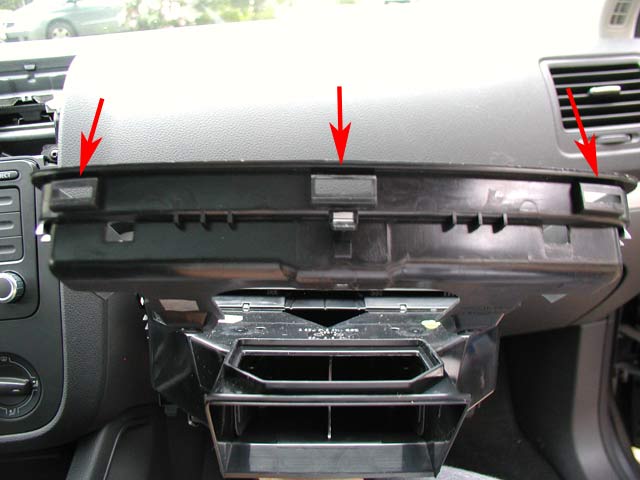
Begin by removing the 2 torx screws in the middle of the unit. Next you will need to remove the unit by inserting your screwdriver at each of the pry points. I suggest carefully reviewing the photos below to identify where these points are.

Below is the right side of the upper dash cover. The left side is the same. The arrows indicate where the pry points are.
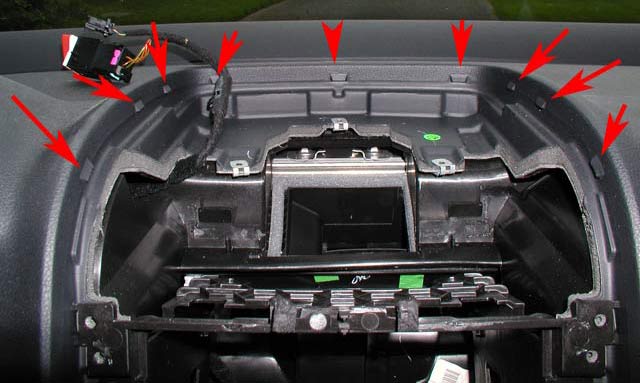
Below is the top part (closest to the windshield) of the upper dash cover. The arrows indicate where the pry points are.
Below shows the pry points with the upper dash cover unit completely removed.
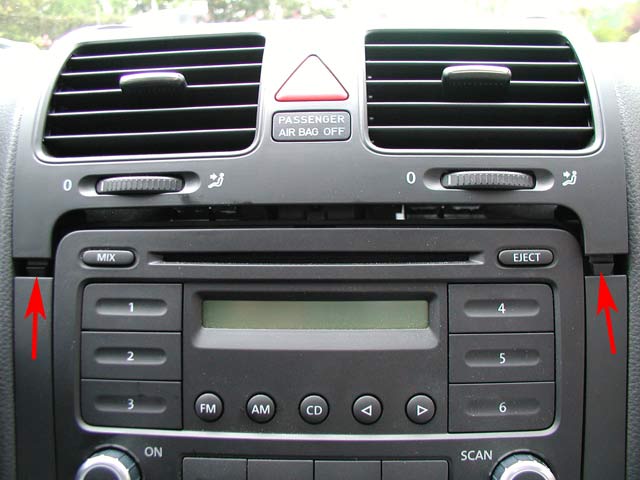
Carefully insert your screwdriver to release the 2 tabs as indicated below. Once these tabs are released, you can lift the cover up and towards you to remove it. Use care as the air bag indicator and hazard switch are wired to the cover.
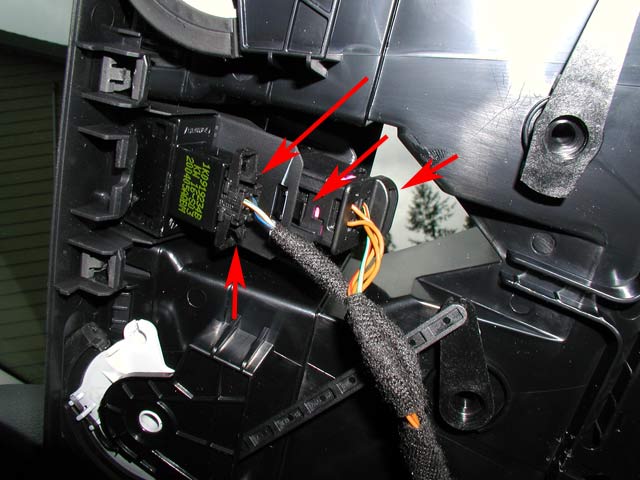
Remove the airbag wire (the one with the blue and white wires) by squeezing the two side tabs as indicated.
Remove the hazard switch (the one with the orange wires) by squeezing the tabs as indicated.
The wiring harness is attached to the cover with a retaining clip (not shown) which you will need to pry off for complete removal.
Step 7
You will now need to remove the lower cover.
Begin by removing the 2 torx screws as indicated below.
Next you will need to carefully pry the cover off at the pry points as indicated below.

Below you can see the pry points with the cover off.
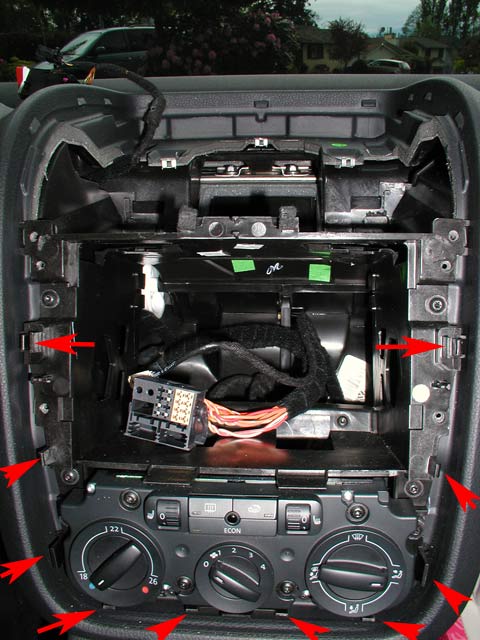
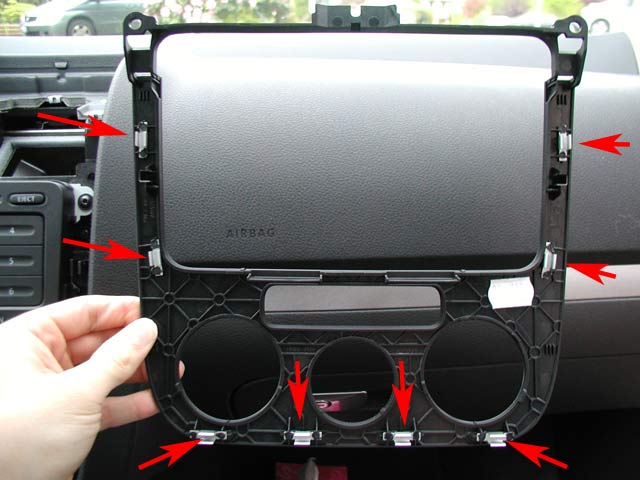
Below you can see the back of the lower cover, and the retaining clip locations.
Step 8
Next you will need to remove the radio head unit. Begin by removing the 4 torx screws as indicated below.

Once you have removed the torx screws, gently pull the unit out towards you. You will then see the radio wiring harness, and the antenna wire attached to the back of the head unit.
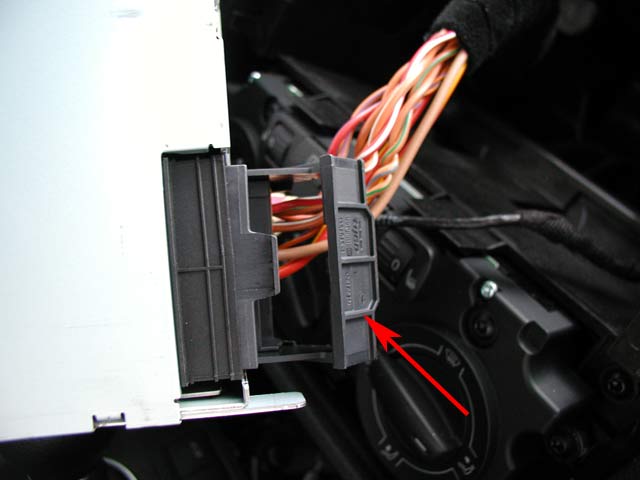
Remove the wiring harness by pulling the harness lever back as indicated below. You can then pull the harness off.
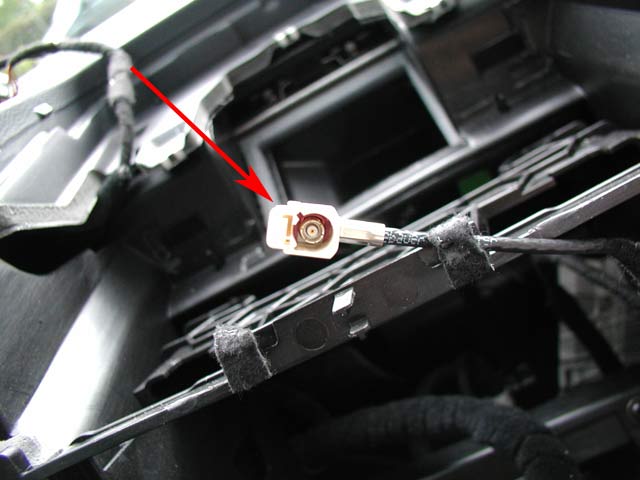
The antenna wire is on the opposite side of the radio harness, and is simple to remove.
Below you can see the antenna location (left) and the wire harness location (right).
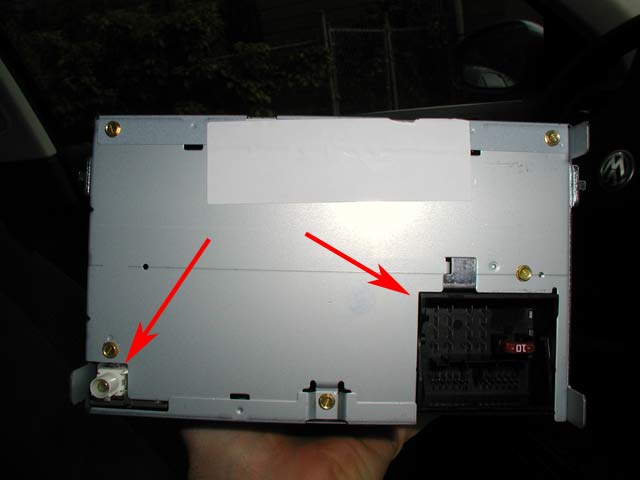
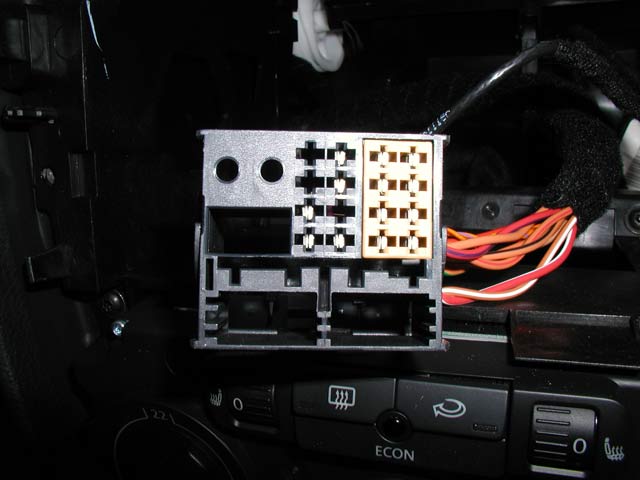
Below is a close up of the harness.
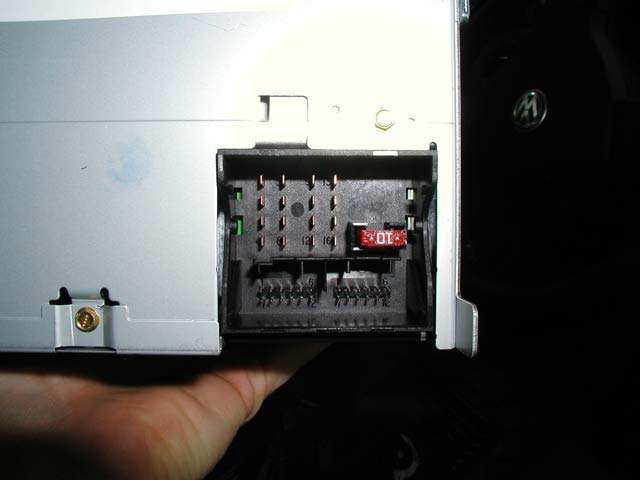
Below is a close up of the radio.
Step 9
Next you will need to run a 12V ignition line from the fusebox to the unit.
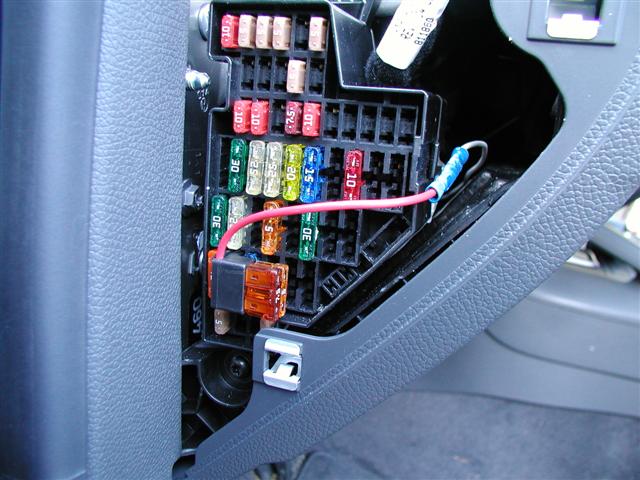
The best way is to purchase an "Add-A-Circuit" from your local parts store. You will need to use the 41A fuse location. I then fished the wire through the dash (beginning from the radio) and used the butt connector to connect it to the add-a-circuit.
Below is a picture of the add-a-circuit and it's fuse location.
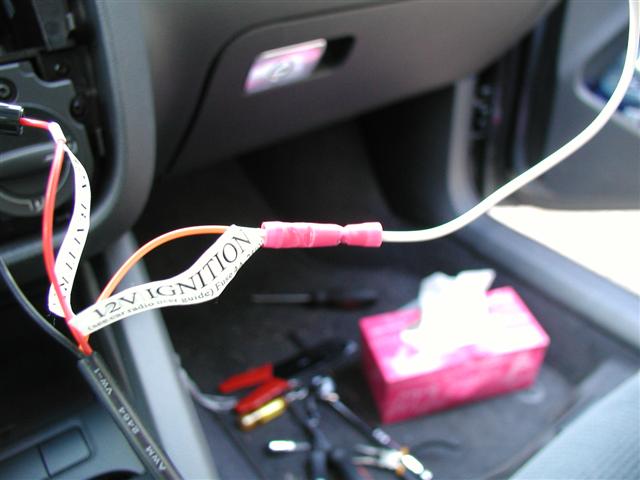
Next you will need to isolate the 12V ignition line from the parrot unit. I cut the fuse off, and connected it to the line I ran to the fuse panel as shown below. You then need to cap the other end of the 12V ignition wire on the parrot loom.
Step 10
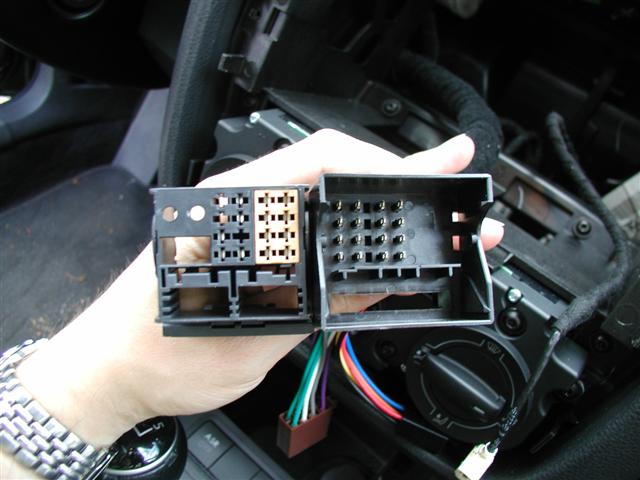
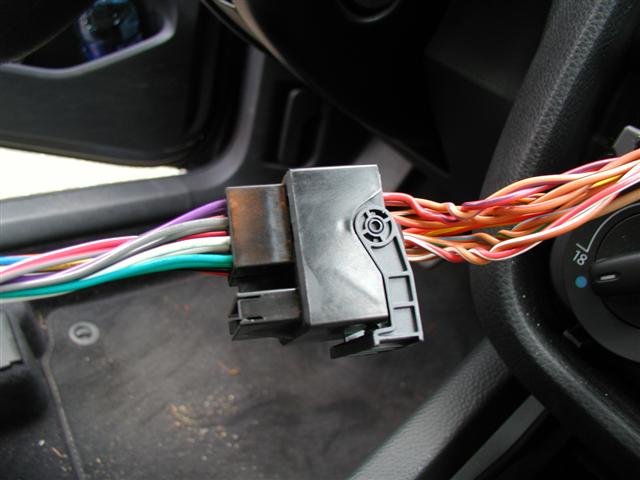
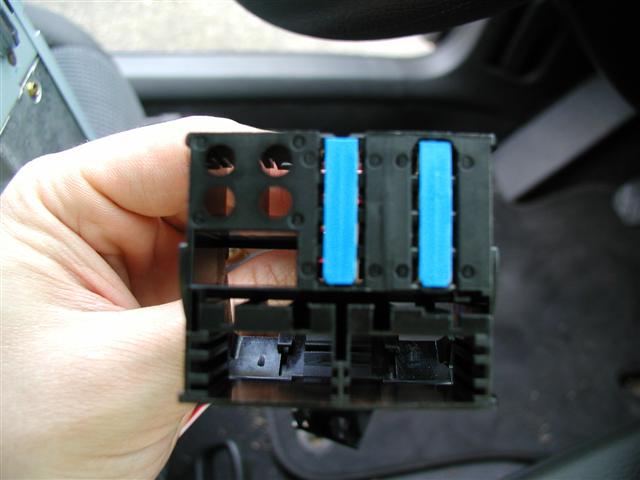
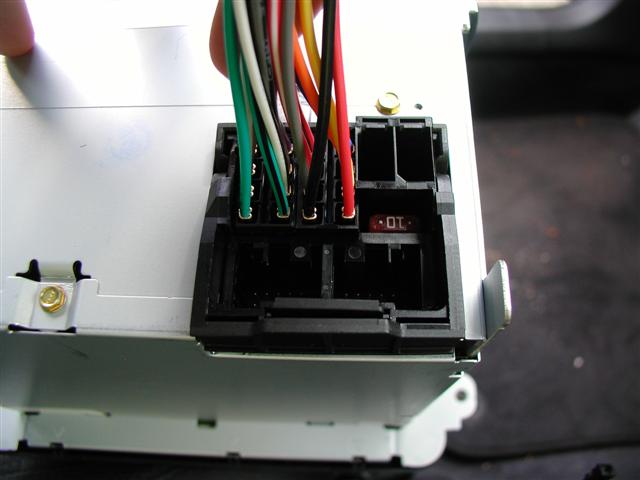
Next, you will need to connect all of the remaining wires to the radio. To make this easy, I purchased a parrot adapter harness from Quickconnect (http://members.cox.net/quickconnect/donotcut.html). You will need to purchase the QCBMW-F harness. It'll cost you around $58.00USD including shipping, but it is well worth it. It saves you a lot of time, and you don't have to worry about voiding your warranty.
Connect the Quickconnect harness to the vehicle harness.
Connect the Quickconnect harness to the radio.
Then connect the remaining leads.
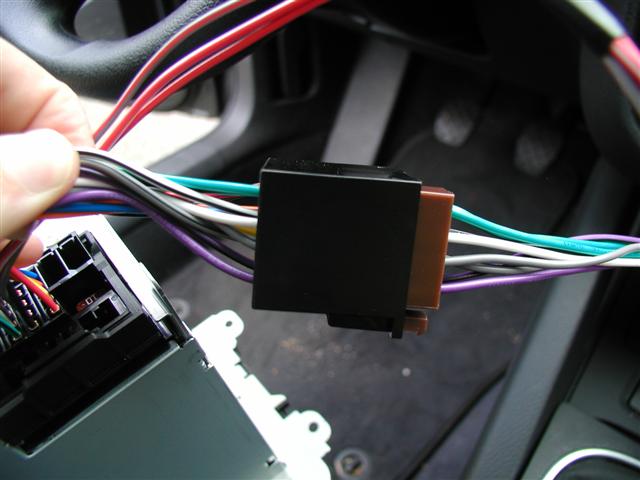
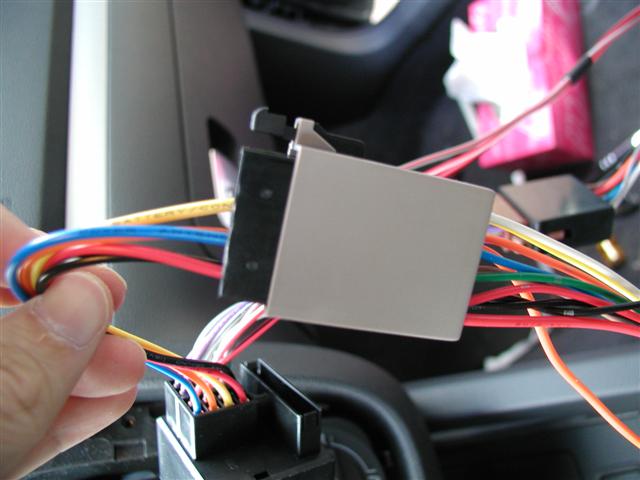
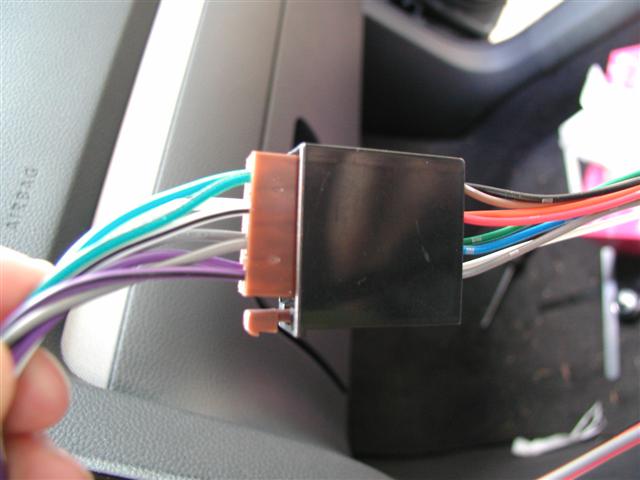
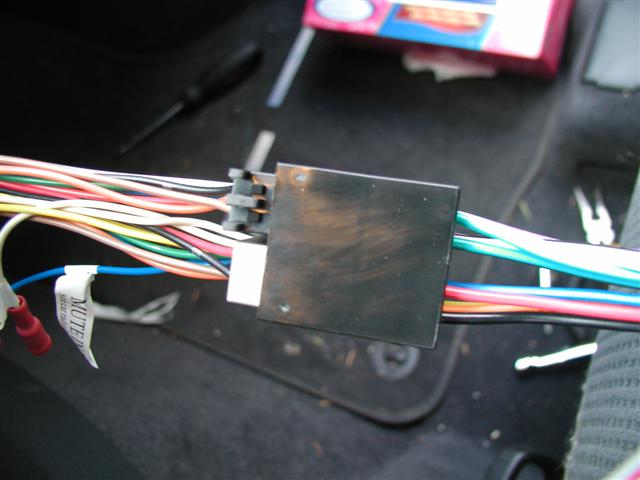
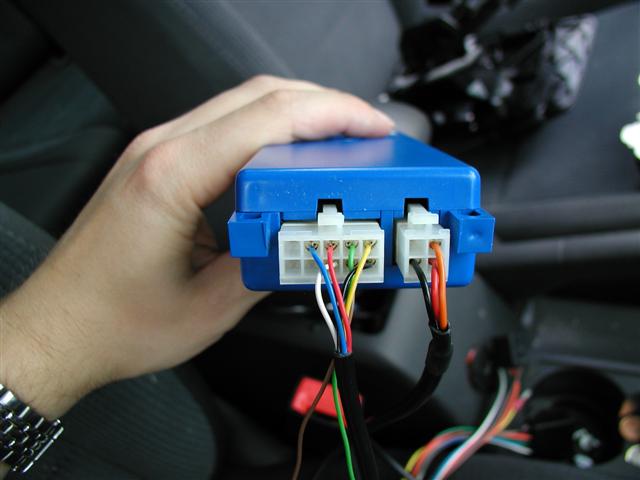
Then connect the parrot harness to the base unit.
Step 11
Next you will need to decide on the placement of the LCD display and the microphone. Since my Jetta does not have climatronic, I decided to mount it where the temperature sensor housing is on the dash.
First, you need to run the LCD and Microphone wires through the vent.
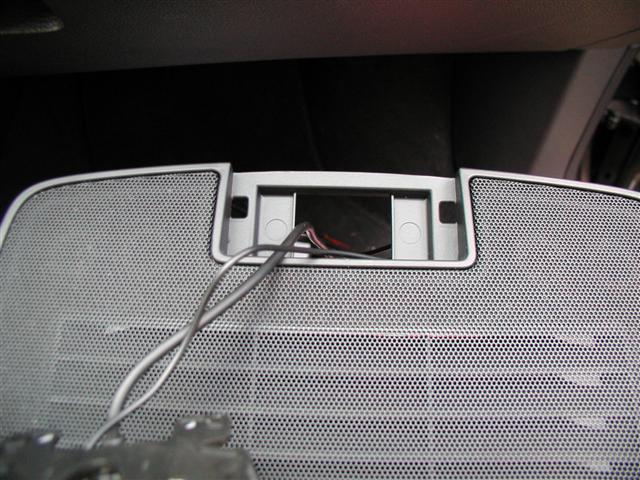
You will then need to run the wires through the vent housing.
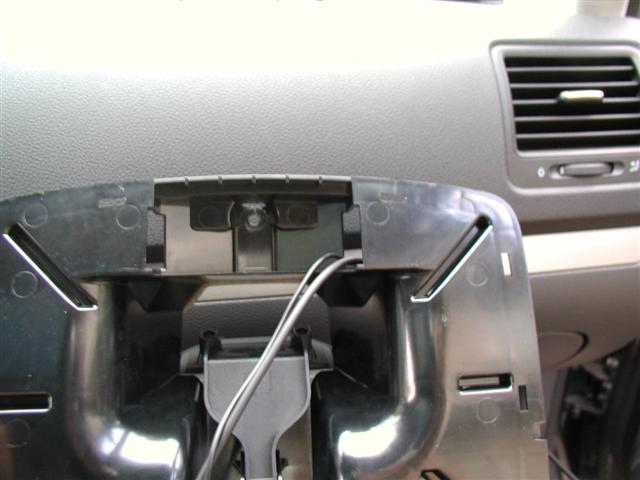
Next you will need to run the wires through the upper dash cover.
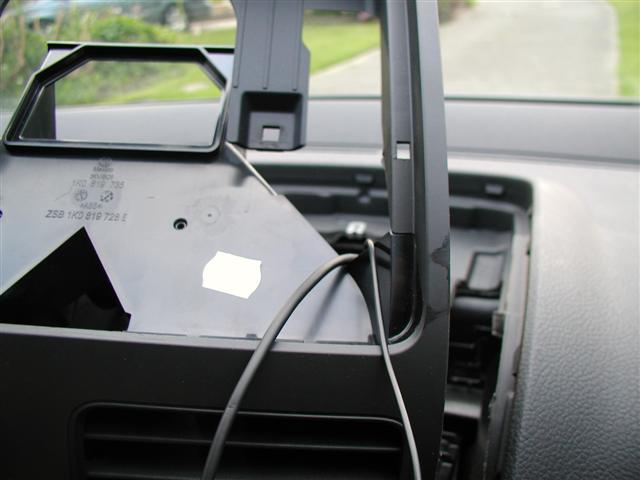
You will then need to feed the wires down to the parrot base unit and connect them.
Step 12
Once you have connected all of the wires to the parrot base unit and radio, you can now mount the parrot base unit. I elected to mount it under the radio cavity. I secured it with zip ties as you can see in the image below.
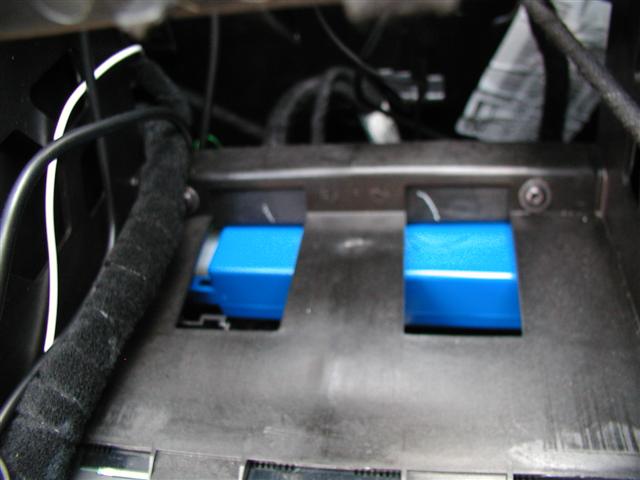
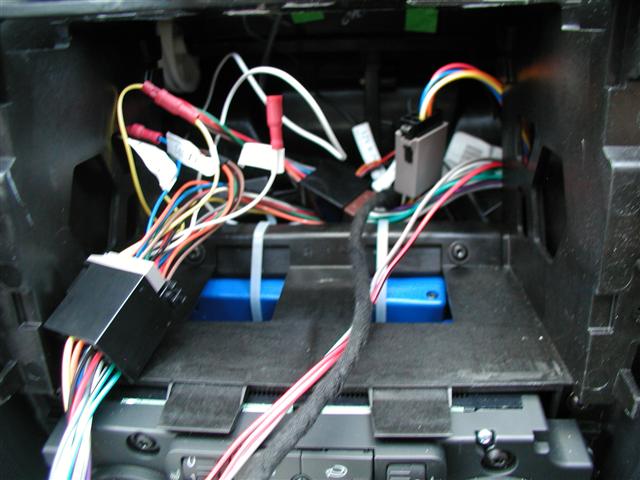
Next you will need to tuck all of the wires back into the dash and out of the way so the radio head unit can be re-installed.
Once you have tucked all the wires in, just follow Steps 8 through 3 in reverse to re-assemble the dash. Be sure to feed the Microphone and LCD wires down into the dash cavity as you go.
Step 13
Next, you will need to mount the LCD and Microphone unit.
First, you will need to apply double sided tape (I used foam tape) into the temperature sensor cavity.
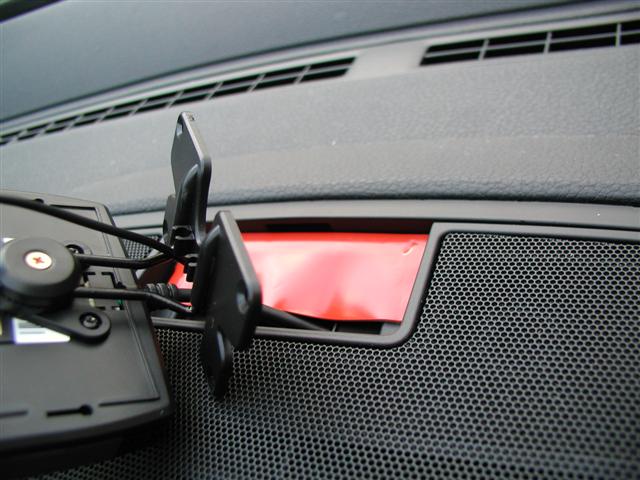
Peel off the backing, and then mount the LCD unit. It actually fits perfectly into the cavity!
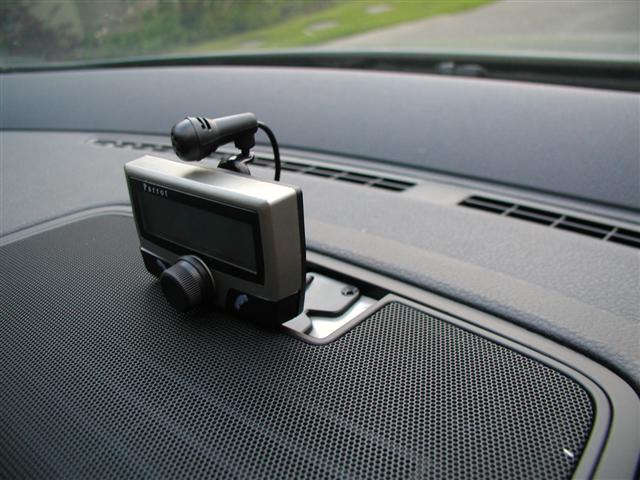
Below are images of the finished job. It almost looks factory!
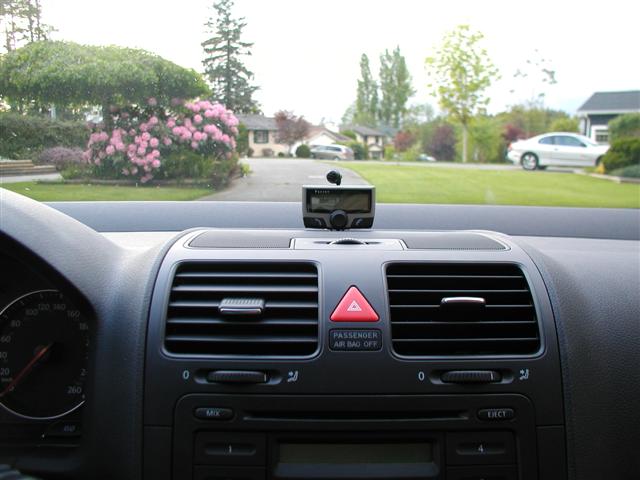
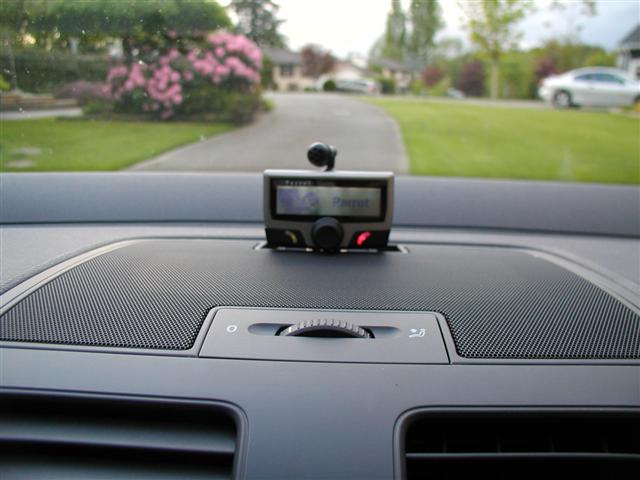
Enjoy your new hands free bluetooth unit!
Cost of install (in Canadian Dollars):
-
Parrot CK-3100 - $190.00 inc. Shipping (Expansys)
-
Quickconnect Harness - $65.00 inc. Shipping
-
Add-A-Circuit - $15.00 (Canadian Tire)
-
Wire - $3.00 (Canadian Tire)
-
Butt Connectors - $2 (Canadian Tire)
-
Double Sided Foam Tape - $2 (Any Office Supply Store)
Total Cost: $277.00
Questions? Email me and I will try to help.
Paul